Making Planting Day Simple & Successful
Last month, we talked about how to start a garden from seed. We went through all the details from planning a garden to starting seeds at home by yourself and hardening them off. If you followed those steps (or did your own variation of them), you should be well on your way to having a beautiful, healthy batch of seedlings that are hardened off and ready to be planted in the garden by your last frost date. Most of the last frost dates in the United States pass by the end of May, with some of the coldest US zones still getting frost into early June. Nevertheless, by late spring, planting season is upon us!
Don’t forget that not all seeds need to be started ahead of time, and some, like kale, spinach, cabbage, and root vegetables, can be planted outside before the last frost date passes. If you’re unsure about this timeline, I highly recommend contacting your local extension service or searching their website to see if they have any guides for your specific area. I am located in Michigan, and I use the MSU Garden Calendar for reference if I have questions. Let's dive into the next steps!
-
Plan the Spacing
Hopefully, before even starting any of your seeds, you had a rough idea of garden spacing. We covered this in the last article, but just a quick refresher: spacing is important! Overcrowding a garden or containers is a recipe for plant diseases and failure. So, just before transplanting your starts or before planting new seeds into the garden, revisit spacing guidelines and your plan. I like to visualize where I need to plant all the transplants by laying them out on the surface of the soil first, then I can go back and focus on planting instead of spacing.
Tip #1: While some of your bigger plants are small in the early season such as pumpkin and cucumber, you can use the space around them with quick maturing crops like spinach, radishes, and green onions! Harvest the smaller crops before the larger plants take over and get more band for your space!
Tip #2: If you’re planting tomatoes like 93% of all home gardeners, you can remove the bottom 2-3 set of leaves and plant the seedling a few inches up the stem. This encourages more robust root development!
-
Add Support
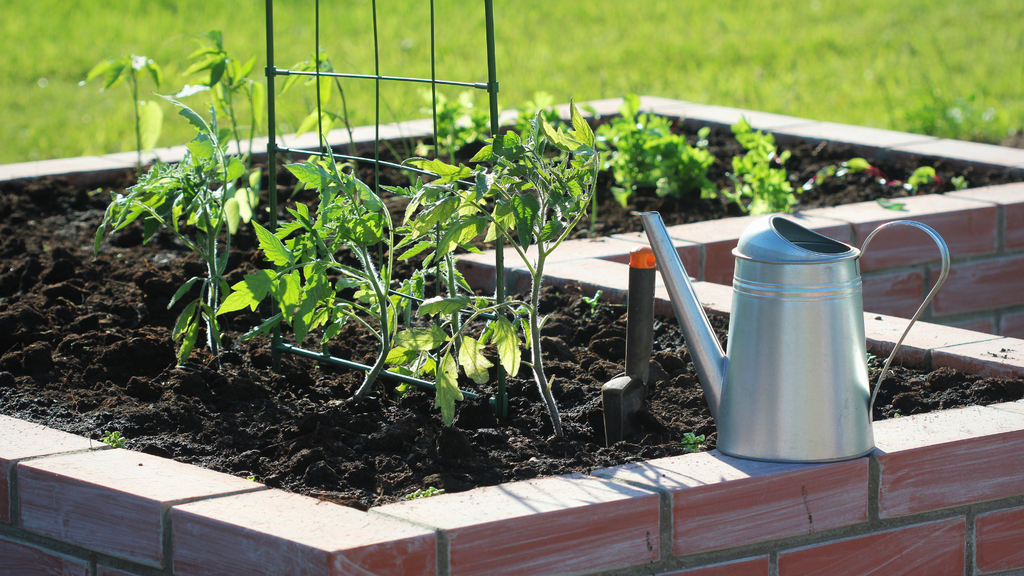
Okay, now that your plants are all in the ground, take inventory and see if you need to add support. This is important to do during planting, as many vining plants do much better with climbing if they are able to do it right from the get-go. You can slowly train climbing plants to scale trellises, stakes, cages, or obelisks throughout the season, but it is a good idea to provide the structure right away to let the plant get used to it. Plants such as pole beans, cucumbers, indeterminate tomatoes, melons, sweet peas, morning glory, and gourds all do well with some type of support to sprawl on. Using a trellis not only saves space in your garden but also improves air circulation and reduces premature fruit and flower loss.
Tip #3: You can also use companion planting to give plants a structure to grow up. The ancient native american practice of the Three Sisters planting method interplants corn, beans, and squash. The corn acts as the structure, the beans climb up the corn, and the squash shelters and protects the soil.
-
Fertilize
One of the first things you will want to do after transplantation is fertilize. The best fertilizer by far is high quality compost. When possible, use compost before and after planting, and side dress 2-3 times throughout the season as well. This not only nourishes the plants but it also benefits the soil long term.
When compost isn’t possible, fertilizers can be purchased as well. You will always see three numbers on any purchased fertilizer. They are nitrogen, phosphorus, and potassium (in the format of N-P-K). Without getting too technical, all you need to know is that nitrogen promotes leaf and foliage growth, and phosphorus and potassium promote fruit and flower development. All three of them are essential for root development. So, in a nutshell (and this is a broad generalization), use nitrogen-heavy fertilizers early in the early season and then switch to fertilizers higher in phosphorus and potassium when flower and fruit development begins.
Tip #4: I really like the University of Minnesota’s guide and the University of Georgia’s website for more information on fertilization.
Tip #5: Overfertilization and underfertilization can both cause detrimental problems. Get a soil test done if you want to be extra certain!
-
Water
The very next thing you should do after planting and fertilizing your garden is water it! Water it heavily so that the composted nutrients or fertilizer penetrate the soil and get deep into the roots. Watering is also crucial at this stage because it gets rid of any air pockets that might have formed near the roots during transplantation.
A typical home garden needs around 2 inches of water each week. There are many factors that impact this such as weather, types of plants used, soil quality, and mulch but unless you happen to have the perfect amount of rainfall each week that keeps your garden soil nice and moist without waterlogging it, plan on being out in the garden to water at least 1-2 times per week. The best time of day to water is the morning, before 10 am. This timing maximizes water absorption and minimizes evaporation.
Tip #6: When watering, it is crucial to avoid getting water on the leaves of your plants. Wetting the leaves promotes plant diseases and disease spread like no other. Drip irrigaton systems are the best solution for this but a soaker hose nosel and/or just careful watering at the base of the plants are also good strategies.
-
Monitor and Maintenance
Congratulations! Your garden is installed! I always feel like the hardest part is getting started, and you’ve done it. Now all that's left is monitoring and maintenance. Monitor your garden every day for pests and weeds. Pull weeds as soon as they appear to reduce competition for nutrients and space. Mulching is a great option for weed prevention and water conservation. Check the plants thoroughly AT LEAST twice a week on all sides of the leaves (including the underside). The best pest management program is one of prevention!
Tip #7: If this is your very first year gardening, I wouldn’t worry about pruning. Pruning can encourage some plants to focus their energy better but it isn’t required. If you’re interested you can check out U of W’s resource about pruning tomatoes. Similar methods and reasoning described there applies to cucurbits (melons, squash, and cucumber) as well.
Whether you’re a seasoned grower or just getting your hands dirty for the first time, getting through seed starting, transplanting, and that initial burst of activity is a huge accomplishment. The rest of the season is all about building on the foundation you’ve laid—watering wisely, keeping up with maintenance, and watching your plants grow and thrive. It’s one of the most satisfying feelings, seeing something you started from seed stretch toward the sun and eventually feed you or bring beauty to your space.
Remember, gardening is a journey, not a destination. Some things will go right, and some might go sideways. In fact, something will undoubtedly go wrong! Each season is a learning experience, and nature is a great (if sometimes brutal) teacher. Keep checking in with your garden, stay curious, and don’t be afraid to reach out to your local resources or gardening community if you hit a bump. You’ve got this, and your plants are lucky to have you!
About The Author:
Lara Wadsworth is a freelance horticulture writer with a Bachelor's degree in Horticulture and over three years of experience creating engaging content about gardening and plant care. As a wife, mom, and dog lover, Lara understands the importance of balancing a busy life with a thriving garden. She values practical advice and effective strategies that empower beginners and experienced gardeners alike to grow with confidence. Through her writing, she aims to inspire others to enjoy the rewards of gardening, no matter their skill level.
Tags
- All
- 25 year food
- 25 year shelf life food
- 72 hour kit
- Best food storage types
- Best long-term food storage
- Blizzard preparedness
- Budgeting
- canning
- Certified GMO-free Emergency foods
- Certified GMO-free foods
- Coffee
- Comparison of emergency food methods
- Composting tips
- Dangers of genetically modified foods
- dehydrated food
- Edible Wild Plants
- emergcy preparedness
- Emergency Cooking
- Emergency Food
- Emergency food Christmas gifts
- emergency food storage
- Emergency Food Supply
- Emergency food supply recommendations
- Emergency Planning
- Emergency Preparedness
- Emergency preparedness advice
- emergency preparednesss
- Emergency Supplies
- Emergency supplies checklist
- Emergency Survival
- emergency survival gear
- Emergency survival kit checklist
- Emergency Survival skills
- exercise
- Family emergency preparedness
- Family emergency preparedness plan
- Family Preparedness
- Food Storage
- Food storage 25 year shelf life
- Food storage amounts
- Food storage Christmas
- Food storage containers long term
- Food Storage Secrets
- Food storage serving size
- Food storage types compared
- freeze dried food
- Freeze dried food storage
- freeze dried meats
- Freeze-dried emergency food storage
- Fruit Trees
- Gardening
- Getting Started
- Gluten-free food Storage
- Gourmet emergency food
- Healthy food storage
- How much emergency food to store
- Improved emergency preparedness
- Jared Markin
- Jared Matkin
- Legacy Premium
- Lessons learned from Hurricane Sandy
- Lessons learned from natural disasters
- long-term food storage
- Long-term Food Storage Guidelines
- Long-term Food Storage tips
- Long-term water storage
- Mental Emergency Preparedness
- Mental toughness
- Money-saving tips
- Natural disaster planning
- Natural Disasters
- Perfect Christmas gifts
- Pet Emergency preparedness checklist
- Pet Emergency preparedness kit
- Pet Emergency Survival tips
- Pets and Emergency Preparedness
- Plant Foraging
- portable solar panels
- portable solar power
- portable water filters
- protein drinks
- Risk of genetic modification
- Seed saving and storage
- Seed saving guide
- Self-reliance
- Self-reliant practices
- Shelf Life
- Solar Cooking
- Solar Ovens
- Special Dietary needs
- Stranded in a car in a blizzard
- Survival food
- Survival Gear
- survival kit
- Survival kits
- Survival Ovens
- Survival Skills
- survivalist gear
- suvival kit
- Tree Pruning tips
- Tree Trimming basics
- unique ideas
- water bottle with filter
- water filter
- water filter straw
- water filters
- Water Filtration
- water pitcher with filter
- water pitchers with filters
- Water purification
- Wild Food Foraging
- Winter composting
- Winter driving
- Winter preparedness tips
- Winter storm preparedness tips
- Winter Survival